Building a RuuviTag weather monitoring dashboard using AWS IoT
Use case
Setting up a remote-readable dashboard for RuuviTag sensors using off-the-self tools as much as possible.
In the end, you will have the following kind of dashboard for displaying data. You can also add multiple sensors if needed.
What you’ll need for this
- An AWS account https://console.aws.amazon.com
- A RuuviTag device
- A Raspberry Zero W (or a larger one) https://raspberrypi.org/products/raspberry-pi-zero-w
Architecture

Setup
Raspberry Pi Zero W
Follow the headless setup instructions from the Raspberry Pi site.
Note: You might want to login using SSH keys instead of the default username/password combo.
Setup example repository to Raspberry Pi device
git clone https://github.com/markusl/ruuvitag-aws-iot-monitoring.git- Install the prerequisites:
cd app-old/
sudo apt-get install libudev-dev libusb-1.0-0-dev
npm install
- Install NodeJs using the
node-install.shscript (there are no official NodeJs binaries for ARMv6).
Configure AWS IoT device
Open awsiot/bin/awsiot.ts and configure the relevant RuuviTag id’s for AWS IoT event rules.
Then deploy the AWS IoT cloud infrastructure:
cd awsiot/
# Install AWS CDK command line
npm i -g aws-cdk
# Install libraries
npm install
# Deploy the IoT device configuration
cdk deploy AwsIotStack
# Deploy the CloudWatch dashboard
cdk deploy AwsIotDashboardStack
Configure and run the application
- Go to AWS Secrets Manager in the AWS Console and look for
RaspberryPiZeroW-Credentials.
- Use the Retrieve Secret Value button to get
certificatePem,privateKey, andpublicKey. - Configure proper keys under
keys. - Update proper endpoint and client id in
start-monitoring.sh

Run the application:
sudo apt-get install screen
screen app-old/start-monitoring.sh
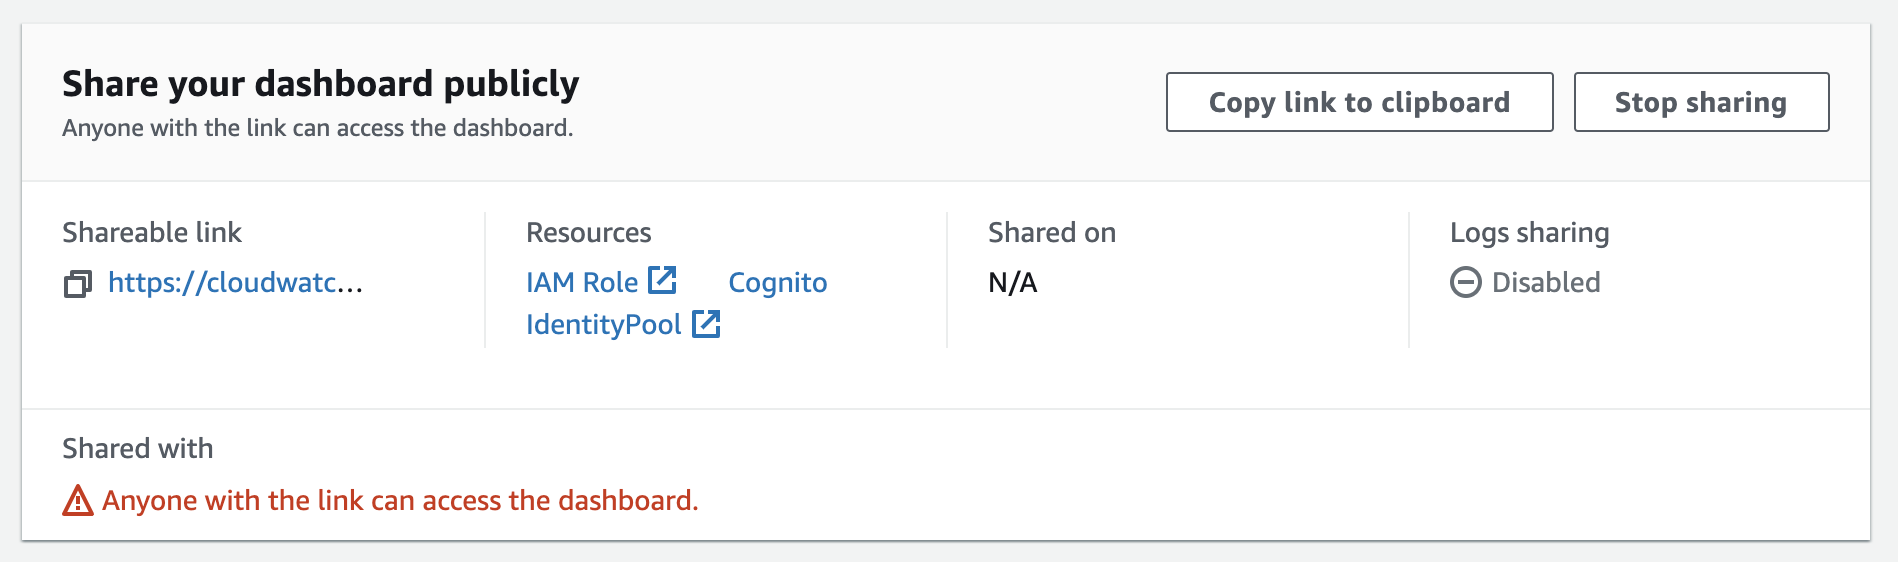
Configure the AWS CloudWatch dashboard for sharing
In AWS Console, go to CloudWatch -> Dashboards to configure sharing.
Enjoy!
That’s it, enjoy 
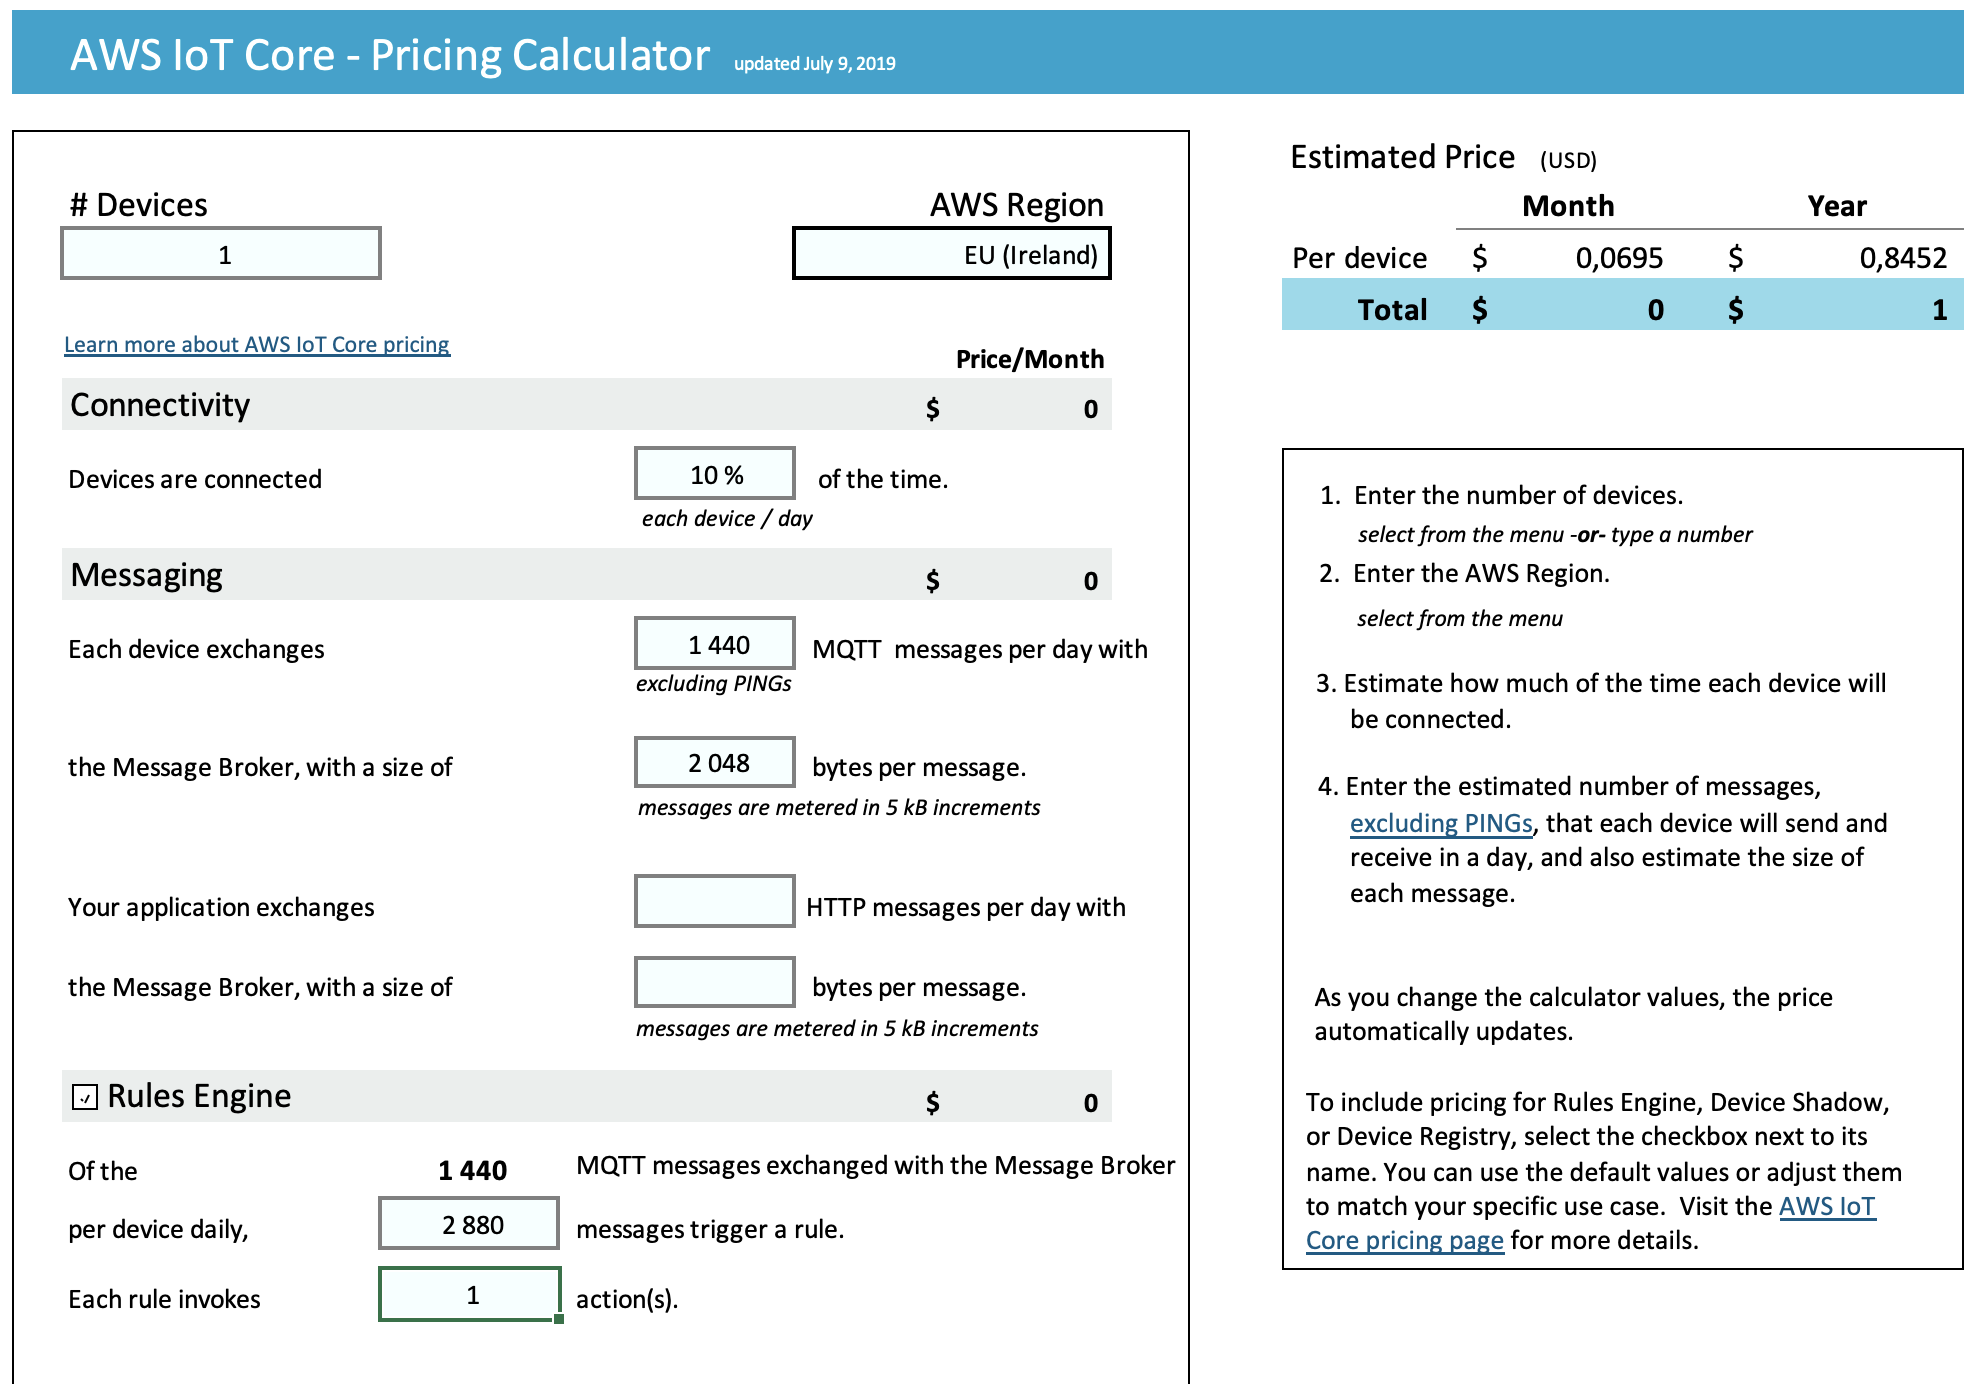
Costs for AWS Usage
With just one device, the AWS IoT usage is almost free. Note that you can utilize the 12-month free trial before charges start applying.
Random notes / lessons learned
NodeJs
The idea was to use the most minimalistic version of Raspberry Pi for synchronizing the data from BLE to AWS IoT. As I had no previous experiences with the devices, I didn’t know they had different processor architectures: ARMv6 in Raspberry Pi Zero models and ARMv8 in RPi3 and newer.
The ARMv6 device comes with a NodeJs 10, and installing NodeJs 14 turned out to be slightly complicated but worked with instructions from https://raspberrypi.stackexchange.com/questions/111130/how-to-install-nodejs-v12-on-raspi-zero-armv6-not-available-for-download-anymor.
AWS IoT SDK
It seems AWS IoT SDK v2 does not work on RPi Zero: https://github.com/aws/aws-iot-device-sdk-js-v2/issues/119 The issue is still waiting for more details. The instructions, however, work with the SDK v1.
AWS IoT Actions
AWS IoT actions nicely integrate to multiple AWS services automatically.
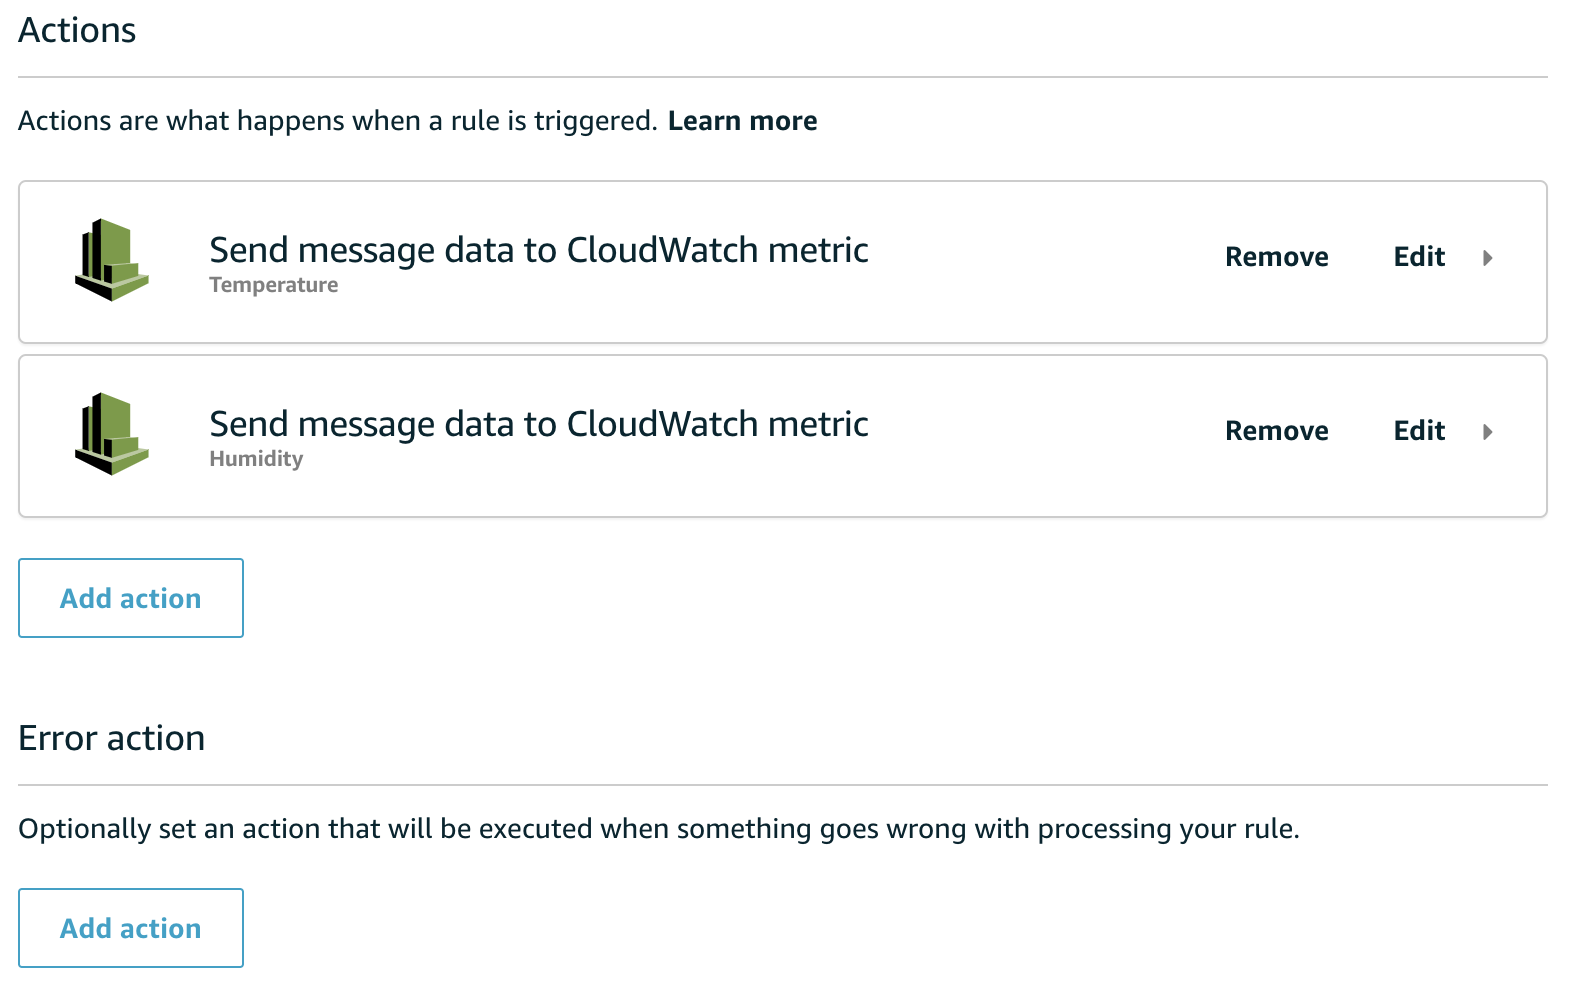
The Error Action does not seem to be supported in CloudFormation infrastructure automation which prevents deploying automated alerts if something goes wrong. The error action can be added manually after the infra deployment.
Infrastructure automation
Creating AWS IoT keypairs with infrastructure automation turns out to be rather complex. However, after a few iterations, I managed to get a CloudFormation custom resource working with the AWS CDK programming model.