We are planning to use Ruuvi tags without using the accellerometer or the pressure/temperature/humidity sensors. We will be reprogramming the nRF52x host to use very low power and we do not want either sensor drawing much power from the battery. I can see from their datasheets that both sensors use very little power when they are “powered down” or in a “sleep” mode. So, we will just need to ensure that both sensors are in a low-power state. Are each of the sensors in a low-power state by default when they are powered up or do we need to exercise each of their SPI interfaces to put them into a low-power state? If we need to put each sensor into a low-power state, please advise if there is sample code that supports this function.
Are you sure? In looking at the schematic for B6, I see no gpio control of these modules, just the SPI interface and a couple interrupts coming from the accelerometer to the Nordic part.
Module power control via gpio would be great for a future rev.
If each modules default state at power up is a “low-power” state, then no change is required. If not, the SPI interface to each module will have to be used to put each module into this state.
By GPIOs I meant all the lines connected between sensors and nRF52. Like you said, there are SPI bus lines and interrupt lines which all should be configured to known states (which will not draw power) after reset.
If you’re going to buy in bulk, contact sales@ruuvi.com for a quote of RuuviTags without the sensors. That will save you a few microamps of stand-by current as well as a bit of money.
Hello, I have the same question as OP, 6 years later. Unfortunately the link posted above is no longer valid, does anyone have the new link?
Basically I would like to disable the accelerometer and barometric pressure sensor on my Ruuvi tags in order to conserve battery power. And frankly, we just don’t need the data clogging up the charts and logs.
Outright disabling the sensors is not the best approach, as disabled sensors do not get configured and they might not enter sleep mode. Leaving sensors configured but in sleep mode will minimise your power consumption, and data will be the “Not Available” value.
If you want to squeeze down every last bit of power, you can also set SENSOR_PWR_2 LOW after the initialisation. e.g.
I don’t remember if I got the constants right down to the letter, but idea is to write low + configure to input.
This works because DPS310 and LIS2DH12 happen to share the power bus and no other sensors are on the same power bus, so it needs to be checked on a case-by-case basis if you use different sensor configurations
'RB_I2C_MAX_SPD' undeclared here (not in a function) in expansion of macro 'APP_SENSOR_PHOTO_DEFAULT_CFG'
I got the error when I tried to build the solution, even before making any edits. Any suggestions? Happy to open a new topic if that is more appropriate.
Now, regarding this (excellent) suggestion:
If you want to squeeze down every last bit of power, you can also set SENSOR_PWR_2 LOW after the initialisation. e.g.
I don’t remember if I got the constants right down to the letter, but idea is to write low + configure to input.
This works because DPS310 and LIS2DH12 happen to share the power bus and no other sensors are on the same power bus, so it needs to be checked on a case-by-case basis if you use different sensor configurations
However when I go to compile it, I am getting this error on the line
How exactly are you trying to compile the project? Make + ARMGCC, SES or something else? versions? Have you installed the submodules with git submodule update --init --recursive?
Yes, I did run the git submodule update --init --recursive command successfully.
The only command that failed for me through all the steps was git checkout 3.30.2, which I thought was OK since I don’t plan to do a PR back into the repo in the future, I will just use this locally. The error from that command is error: pathspec '3.30.2' did not match any file(s) known to git.
Please let me know if you have any suggestions!
Makes sense – thanks! I have added the lines (note the slightly modified constant you weren’t 100% sure on, is NOPULL the correct one for line 2? There is also PULLUP and PULLDOWN)
I think the instructions had a typo, it should be git checkout v3.30.2. If the tag is not checked out, the submodule initialisation may fail as well.
Try running git checkout master to get the latest code unless you need v3.30.2 specifically for some reason, and then installing the submodules again. I think later SES versions have broken some nRF SDK compatibility, I’m using ses_v550c_nordic myself.
I am not sure how, but I am still getting the same error even after completely uninstalling the first SES version, downloading SES 5.50d (the ‘c’ version is unavailable on their website for some reason), completely deleting all the files I first downloaded, and following the steps in the tutorial again, but this time using git checkout master (which worked fine).
Same error! Any thoughts?
I wonder if it’s because I am using the Apple Silicon version? Not sure what other differences there could possibly be.
Fundamentally the issue is that the RB_I2C_MAX_SPD macro has not been defined by the time the compiler tries to expand it, but this is strange considering the same code is compiling for other folks. So I’m reluctant to go and try to start modifying it to work for my installation…
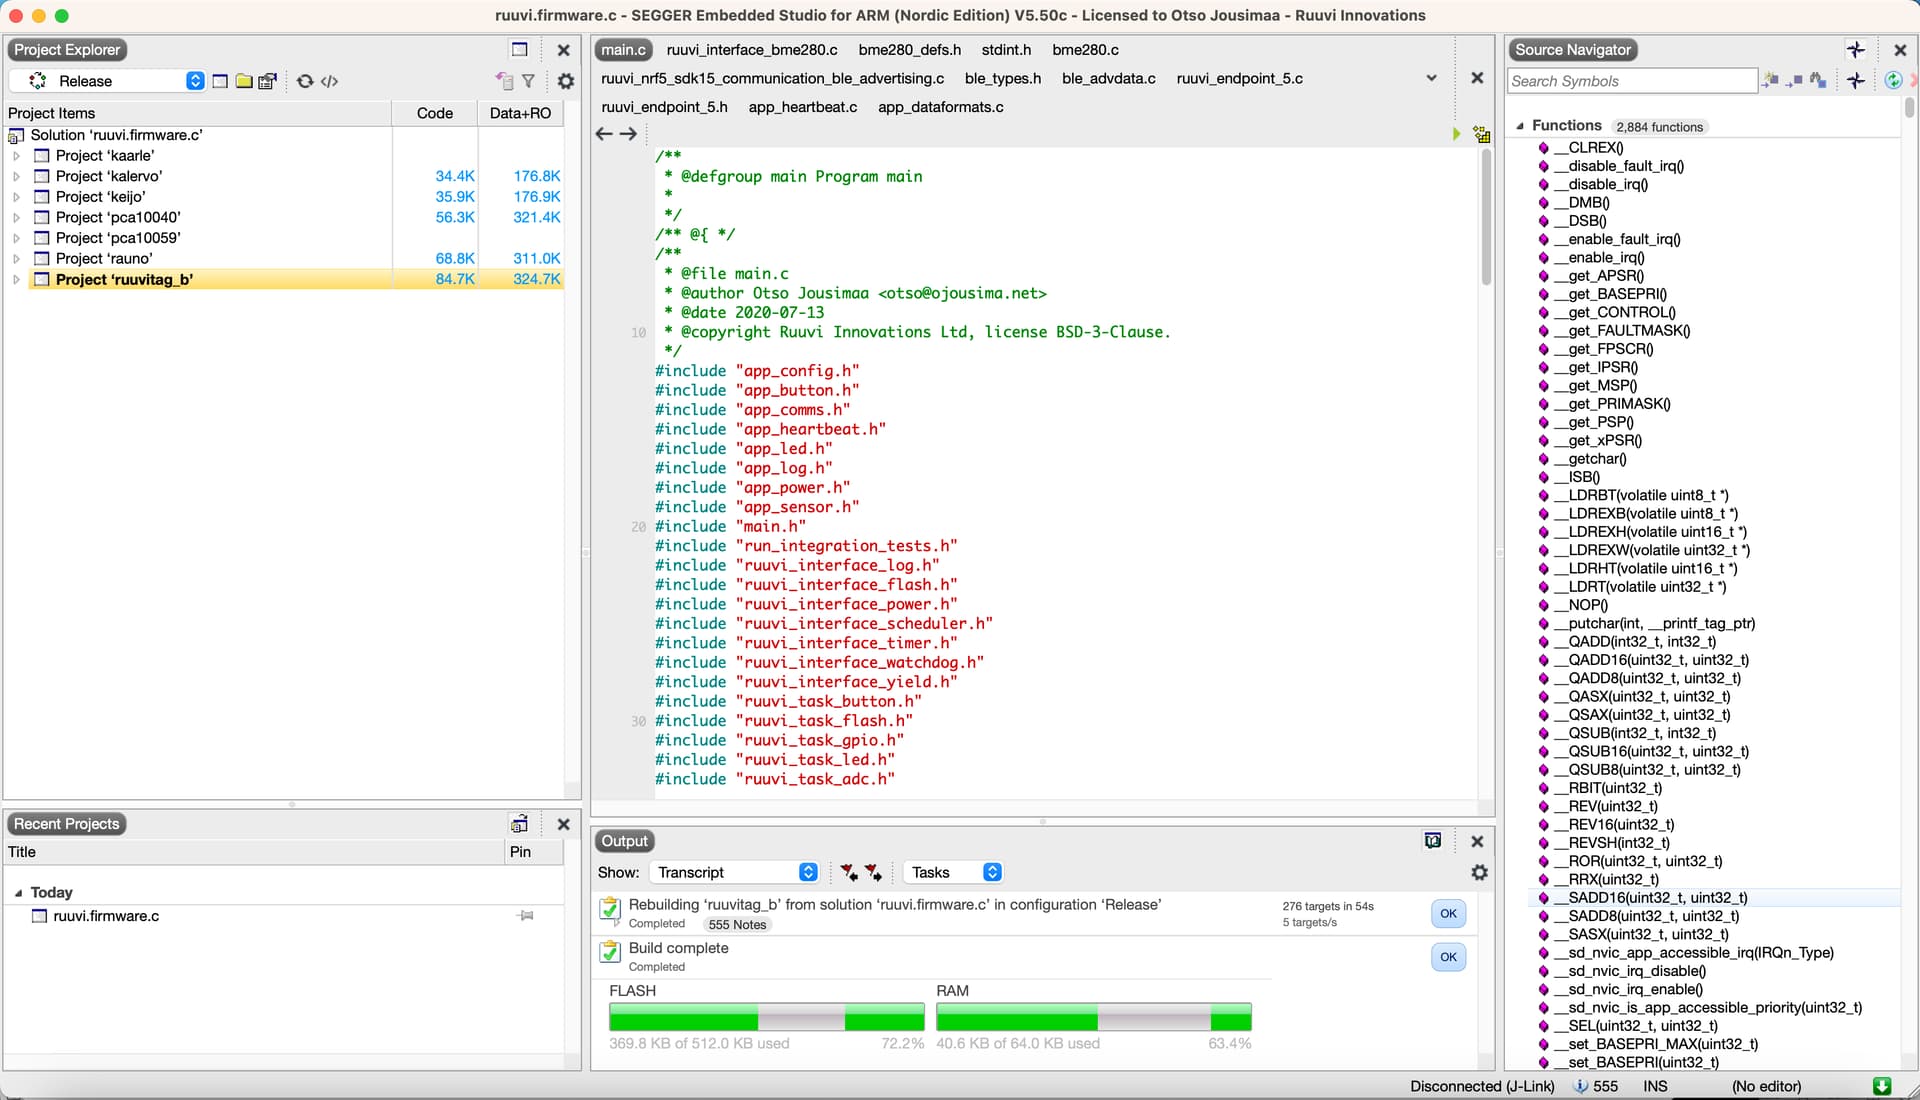
Thanks otso – this may have been a case of user error. As my first time using SES I didn’t realize that I needed to double click ruuvitag_b in the Project pane before building. Not sure what kaarle is, but that’s what it was trying to build. It seems to work now that I’ve selected (by double clicking) Project 'ruuvitag_b'.
Now to try and load the modified firmware through the app with Bluetooth!
It was a prototype batch of boards that was never mass produced, I should clean it off the SES project
My workflow is to develop and debug on SES and once things are working well I build the release binaries with make/ARMGCC. The makefile takes care of a lot of the background work, such as configuring and signing the release package and downloading the signing keys if you don’t have them already in your PC.