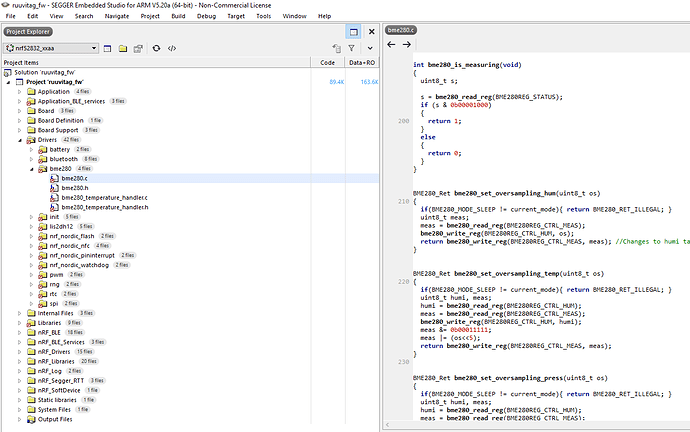
Hi friends, how can I open an existing DFU Ruuvi firmware with Segger Embedded Studio (SES), edit it and save it as DFU firmware.
So that I can update it again via Bluetooth?
I haven’t found a simple guide to do this yet.
Hi,
It depends on your FW version, factory firmware has a debug bootloader and 3.x has checking for hardware and softdevice revisions.
Replace the ARMGCC-built binary with SES output as application hex in scripts below.
Thanks, which version should be used.
I’m currently running 2.5.9 on the Ruuvi and want to adjust the humidity and temperature, because it doesn’t fit that well.
The Ruuvitag is really great, but the sensors are very inaccurate!
(Temperature, sometimes up to 1.3 degrees too little)
(humidity, sometimes up to 6.5 % too low)
Then I want to create the new version so that I can install it on the Ruuvi via Bluetooth.
So which version should I use?
link?
How should it be read in and how should it be saved again?
It would be great if you could continue to support me with your help.
Translated with www.DeepL.com/Translator (free version)
I would apply the offset on receiver, e.g. with Grafana’s Math function.
ruuvi/ruuvitag_fw/blob/master/ruuvi_examples/ruuvi_firmware/ruuvitag_b/s132/armgcc/package.sh is the script to upload on top of 2.5.9 if you want to add the offset in FW.
Is there possibly a video about the procedure?
If I reflash the RuuviTag via shield, I can’t update the firmware via Bluetooth afterwards. No matter what firmware you use, the Ruuvi will not go into DFU mode.
What have I done wrong.
Otherwise everything works after the shield flashing, but not updateable via DFU!
Hello,
How exactly you flash the RuuviTag through shield? Do you make a full-package like above scripts? The package should contain softdevice, bootloader, bootloader settings and application. It sounds to me like you’d be having only softdevice + application.
Video isn’t really helpful here, as it’s all command line commands anyway
I load this in
SES will not include the bootloader, you’ll need to create the package with bootloader and flash it separately.
nrfutil settings generate --family NRF52 --application _build/ruuvi_firmware.hex --application-version 1 --bootloader-version 1 --bl-settings-version 1 settings.hex
mergehex -m ~/git/s132_nrf52_3.1.0_softdevice.hex ~/git/ruuvitag_b_bootloader_1.0.0.hex settings.hex -o sbc.hex
mergehex -m sbc.hex _build/ruuvi_firmware.hex -o packet.hex
and then flash the packet.hex. Use SES binary in place of application hex.
Thank You verry much
can’t I just change the bme280.c and only flash the bme280.c to an existing firmware in RuuviTag?
Everything else remains the same.
You can’t do that because the change in bme280.c will change the CRC of application and bootloader will think that application is corrupted and ask for new firmware. So even if the change is just one number, you’ll need to recompile and repackage the whole package. Alternatively you could flash the binary with a DFU to a tag with bootloader, bootloader will take care of updating the CRC when new firmware comes with DFU
SES will not include the bootloader, you’ll need to create the package with bootloader and flash it separately.
nrfutil settings generate --family NRF52 --application _build/ruuvi_firmware.hex --application-version 1 --bootloader-version 1 --bl-settings-version 1 settings.hex
mergehex -m ~/git/s132_nrf52_3.1.0_softdevice.hex ~/git/ruuvitag_b_bootloader_1.0.0.hex settings.hex -o sbc.hex
mergehex -m sbc.hex _build/ruuvi_firmware.hex -o packet.hex
and then flash the packet.hex. Use SES binary in place of application hex.
Sorry, but how do you get this on RuuviTag?
Is there a step to step instruction how to proceed exactly? Unfortunately I do not understand it yet. I am a complete beginner in this area. Maybe you can help me in some way or make a little video when there is time.
nrfjprog --eraseall
nrfjprog --program packet.hex
nrfjprog --reset
You can get the nrfjprog by installing Nordic Command Line Tools nRF Command Line Tools - Downloads - nordicsemi.com
Nordic has great tutorials and information on how to program nRF52 and how bootloader works, for example Nordic Semiconductor Infocenter.
You might find some of my notes helpful at
http://real-world-systems.com/docs/nrfjprog.1.html
I’m currently running 2.5.9 on the Ruuvi and want to adjust the humidity and temperature, because it doesn’t fit that well.
